Requirement
To install this theme you must have a working version of WordPress. Please refer to WordPress documentation for further instructions. You can download the latest version of WordPress here https://wordpress.org/download/ If…
Installing a WordPress theme is a straightforward process. Here’s a step-by-step guide to help you install a theme on your WordPress website:
If you have a Eventiva theme in a ZIP file that you’ve purchased or downloaded from a Eventiva source:
1. Download the Eventiva Theme ZIP File:
If you haven’t already, download the Eventiva theme ZIP file to your computer.
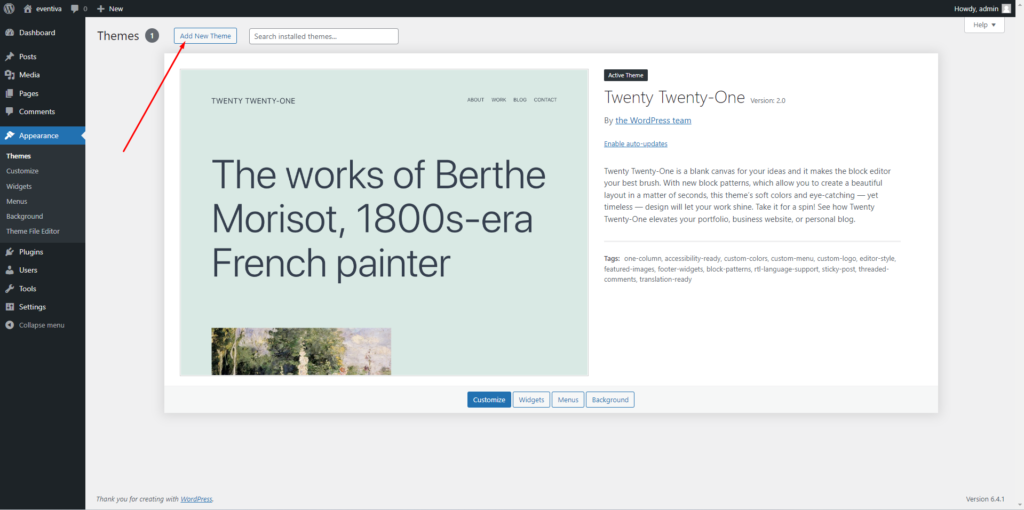
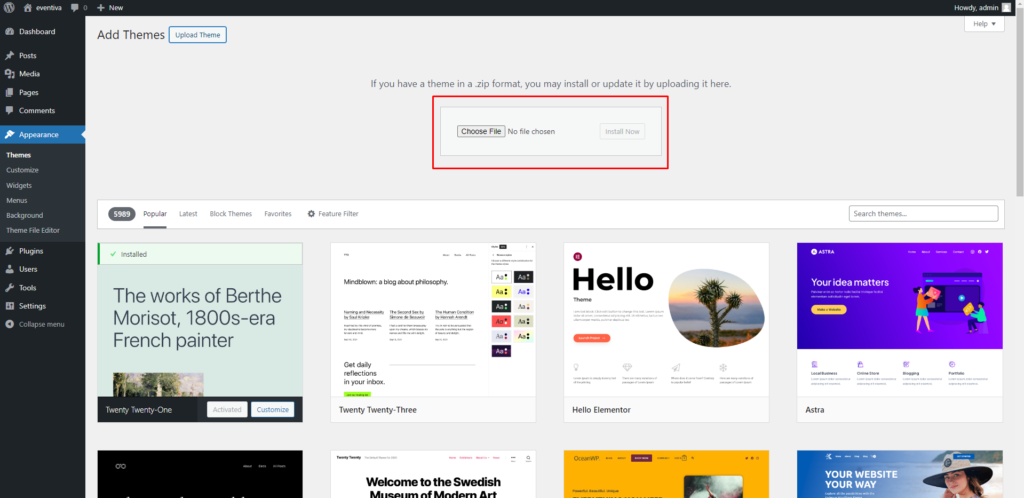
2. Upload the Theme:


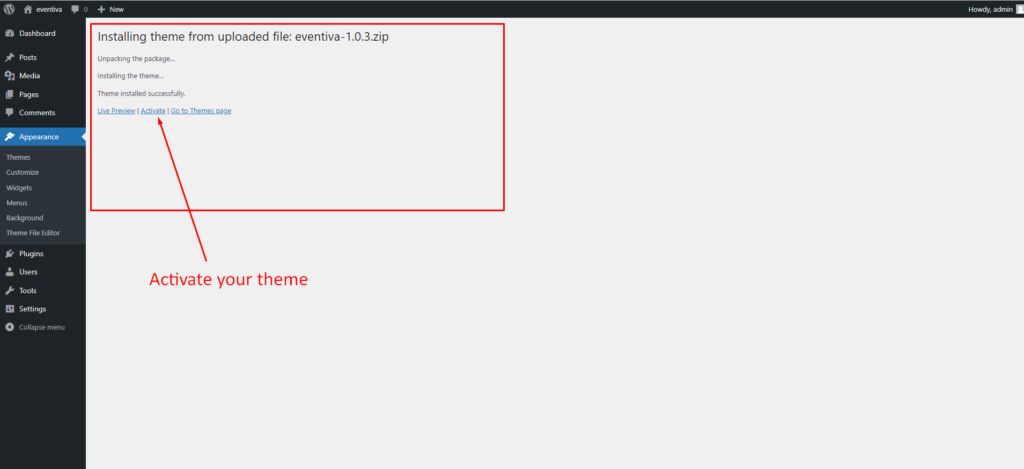
3. Activate the Theme:
After installation, click the “Activate” button to make the theme live on your site.
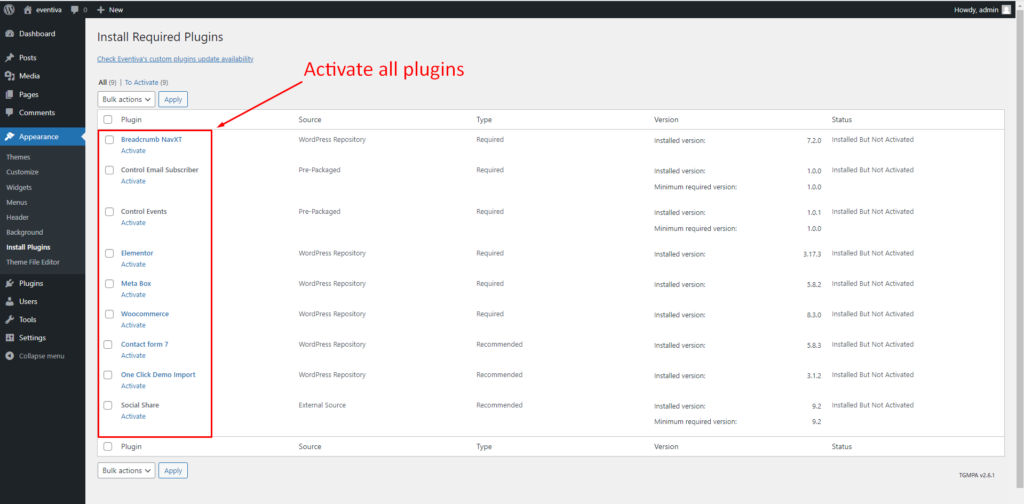
4. Install Theme Required Plugins:
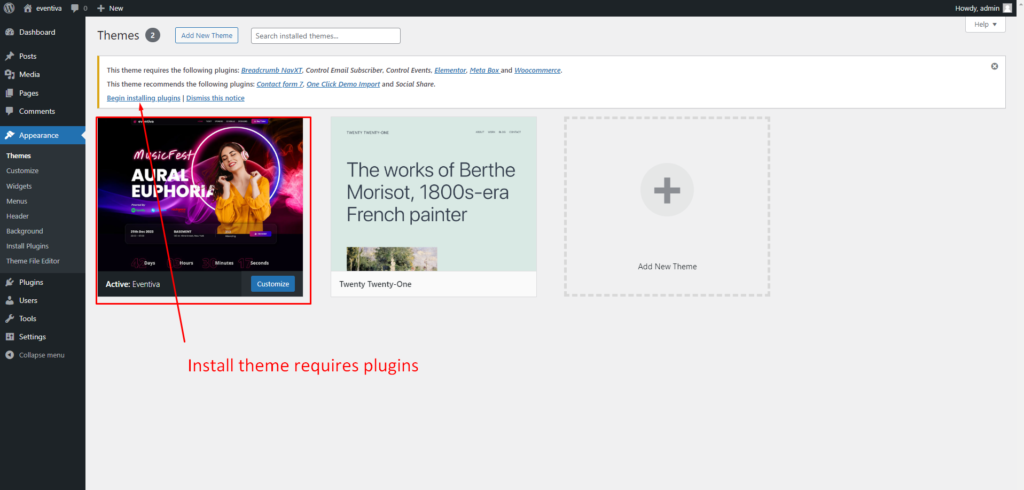

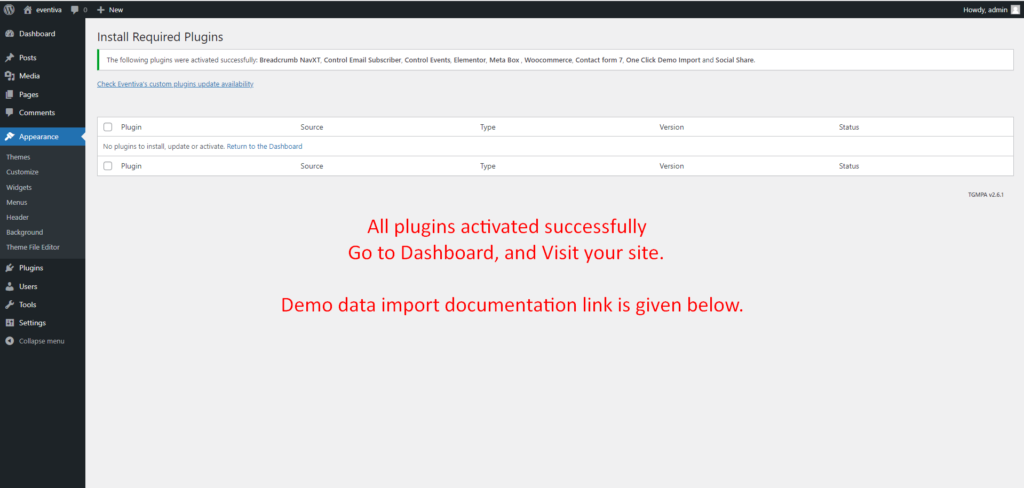
All plugins activated successfully
Go to Dashboard, and Visit your site.
Demo data import documentation link is given.
If you prefer a manual approach:
1. Download and Extract the Theme:
Download the Eventiva theme ZIP file and extract it to your computer.
2. Connect to Your Website via FTP:
Use an FTP client like FileZilla to connect to your web server.
3. Upload the Theme:
Navigate to the “wp-content/themes/” directory on your server.
Upload the extracted theme folder into the “themes” directory.
4. Activate the Eventiva Theme: